Unfortunately, you’ve discovered that when you attempt to upgrade to Windows 11, there’s an error that says your computer’s processor is not supported. What can you do? While the error leads many people to run to the store to buy a new computer, you can actually bypass the error and install Windows 11 anyway.
Should You Install Microsoft Windows 11 with an Unsupported CPU?
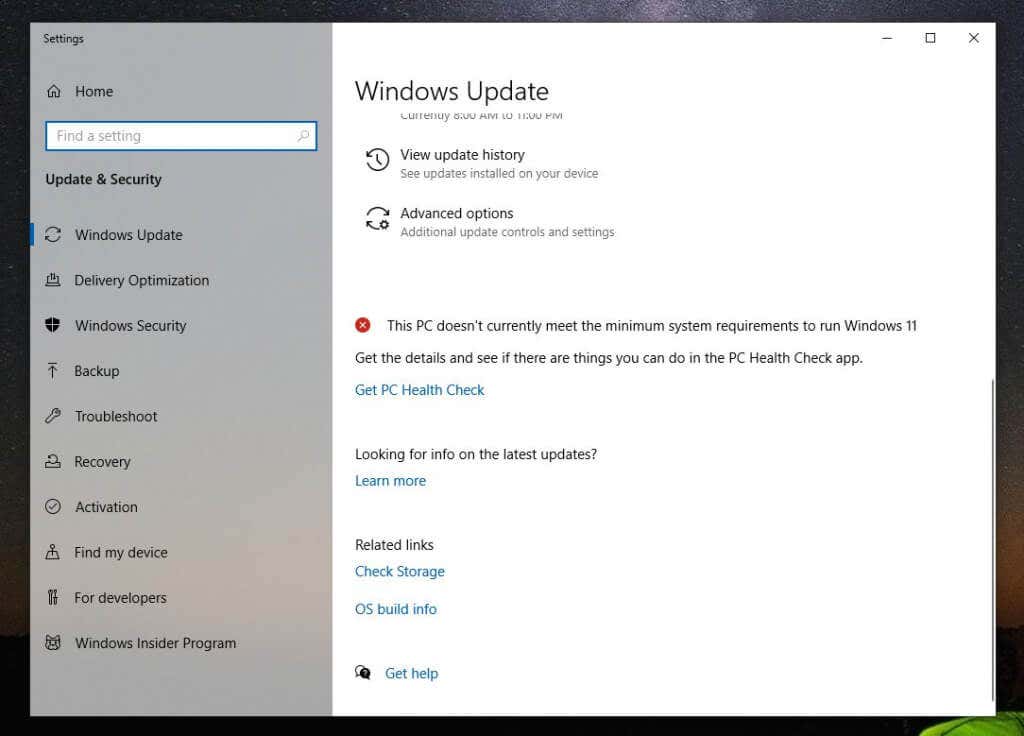
Every computer is different, and the reasons for incompatibility with Windows 11 may vary from one system to the next. You can even upgrade a Windows 7 PC if it meets all hardware compatibility requirements. However, the most common reason for your system not meeting “minimum system requirements to run Windows 11” is an incompatible CPU. Check Microsoft’s list of supported Intel processors and list of AMD processors to see if yours is included. You can confirm this by opening your Windows Settings and selecting Windows Update from the left menu. You’ll likely see the red X icon next to the message, “This PC doesn’t currently meet the minimum system requirements to run Windows 11.”
Running the PC Health Check Tool
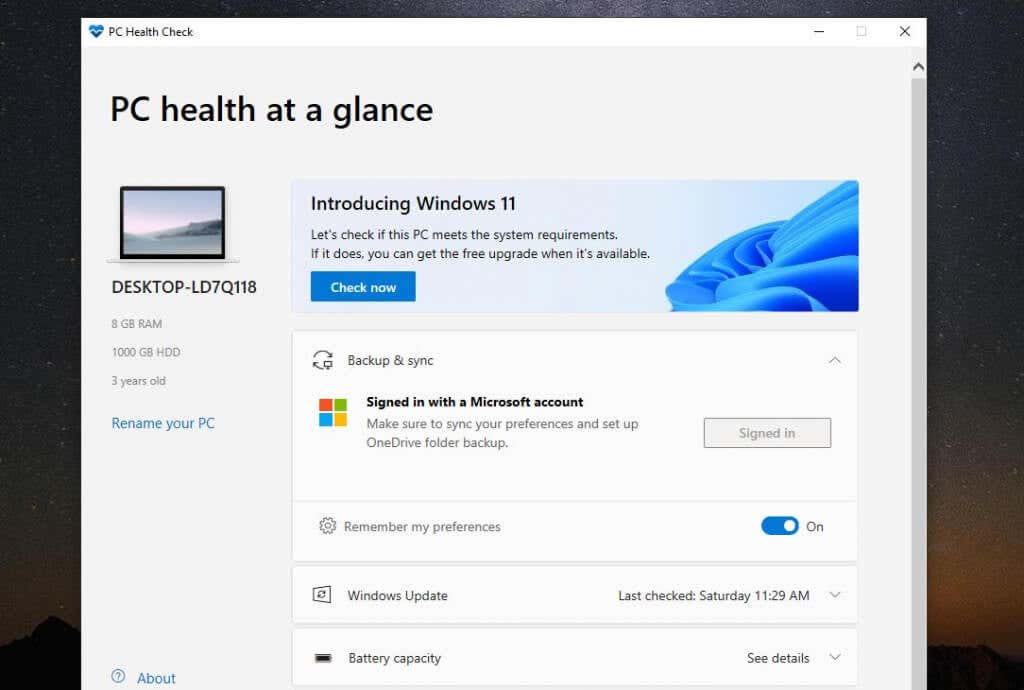
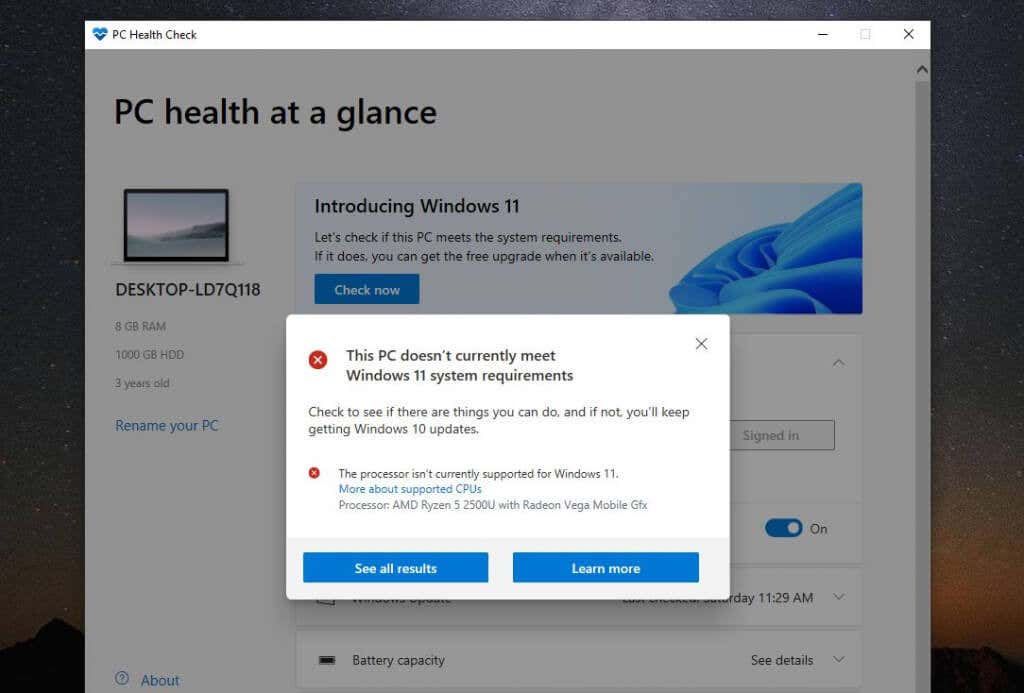
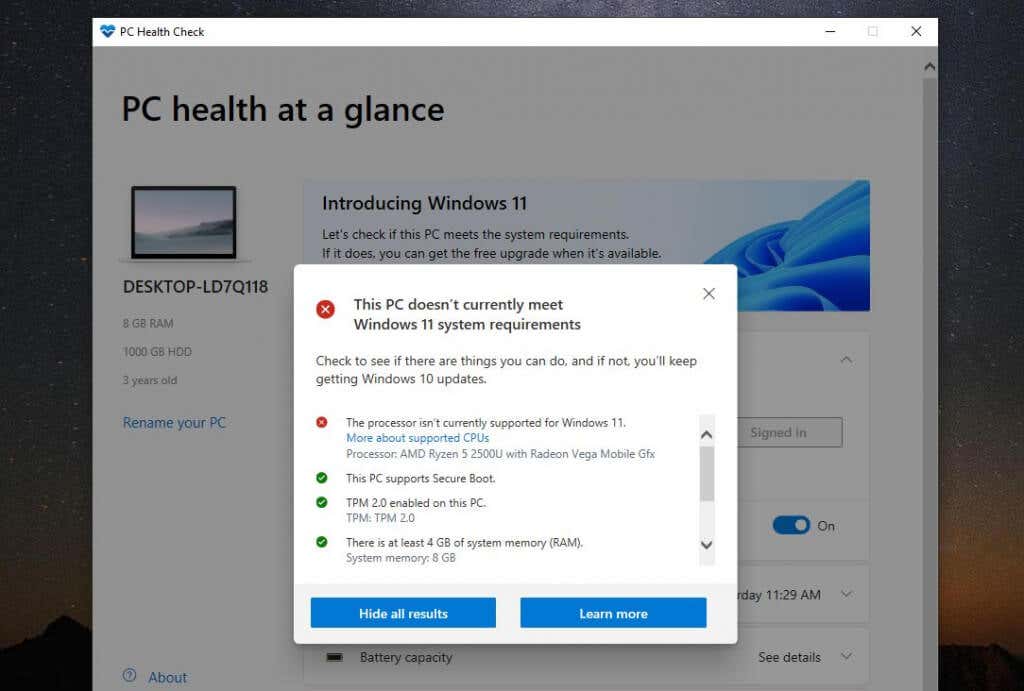
Under this, you’ll see a link to access the PC Health Check app. This tool will scan your computer and give you the specific reasons your computer isn’t compatible with Windows 11. When you first launch the tool, select the Check now button to start the scan. When it’s finished, you’ll see the message again that your system doesn’t meet minimum hardware requirements. But this time, it’ll list the top reason your system is incompatible. The top reason for your system will likely be “The processor isn’t currently supported for Windows 11.” If you select See all results, you’ll see any other reasons your system may not be compatible with Windows 11. This may include TPM 2.0, available RAM, Secure Boot, or your CPU. You can enable Secure Boot settings in your BIOS by changing PC boot mode from “Legacy” BIOS to UEFI/BIOS. Note that this is only if your BIOS has this feature available. You’ll also see where your system IS compatible. Hopefully, the only reason your system isn’t compatible is the processor and nothing else. Ideally, your system should at least have TPM 2.0 enabled. However, even if it doesn’t, you should still be able to install Windows 11 if you want to. Note: Most importantly, you will need at least 4 GB of RAM available, or you won’t be able to install Windows 11 using the workaround outlined in this article.
Should You Install Windows 11 on an Incompatible Computer?
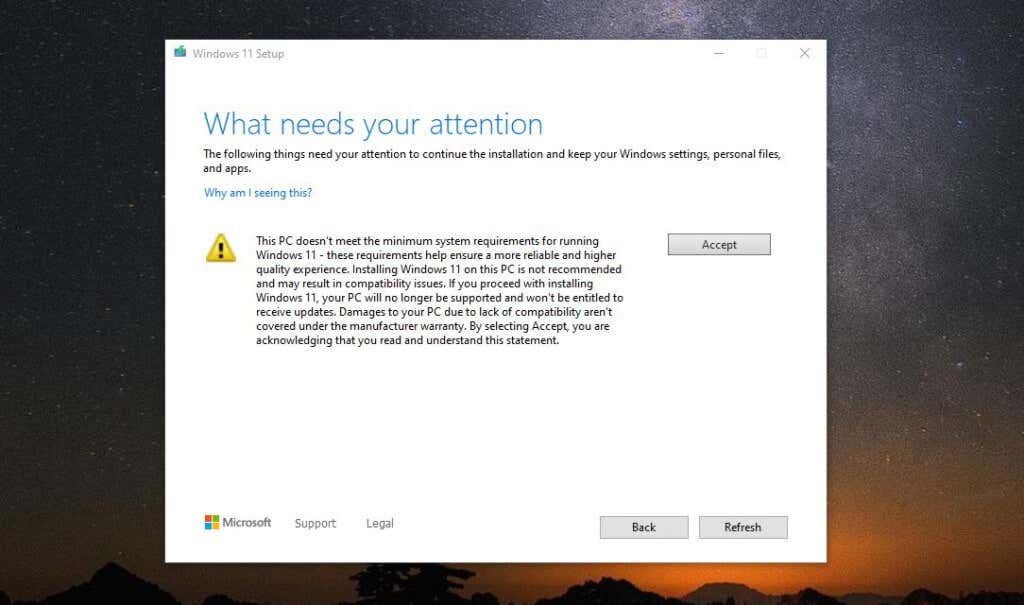
If your system is only incompatible with Windows 11 due to CPU and no other unsupported hardware, you have the lowest risk of any problems upgrading to Windows 11 anyway. However, the risks are not zero. According to Microsoft, anyone who installs Windows 11 on an unsupported PC won’t receive essential Windows 11 updates. In addition to this, Microsoft claims that: “Installing Windows 11 on this PC is not recommended and may result in compatibility issues. If you proceed with installing Windows 11, your PC will no longer be supported and won’t be entitled to receive updates. Damages to your PC due to lack of compatibility aren’t covered under the manufacturer warranty.” These “damages” could mean a higher likelihood of more Blue Screen of Death (BSOD) errors or your computer freezing or crashing.
What About TPM 2.0?
If you’ve noticed in the list of incompatibilities that one of those is the lack of Trusted Platform Module (TPM) 2.0, you can still install Windows 11. However, you will be accepting some additional security risks. TPM is a physical chip in most modern computers that prevents malicious software (malware) from running. If your computer doesn’t have TPM 2.0 enabled, that may not mean your computer doesn’t have the feature. You just need to enable it in the BIOS or purchase a TPM module.
Should I Still Upgrade to Windows 11?
This means that nothing stops you from upgrading to Windows 11 using this guide. However, you will be accepting a certain level of risk if you do switch to this new operating system. Your system may not receive new Windows updates, and you could start seeing more BSoD errors. Many computers that remain on Windows 10 may start experiencing issues receiving newer security updates anyway. For example, this author experienced an endless update cycle where Windows 10 updates failed and had to be uninstalled every time the computer was restarted. In such a case, you really have nothing to lose upgrading to this new version of Windows on an incompatible device and enjoying all of the new features. At the very least, it will help you avoid purchasing a new PC for another year or two.
How to Upgrade to Windows 11 on an Incompatible Computer
If you’ve decided to upgrade to Windows 11, despite all of Microsoft’s warnings, the process is fairly simple.
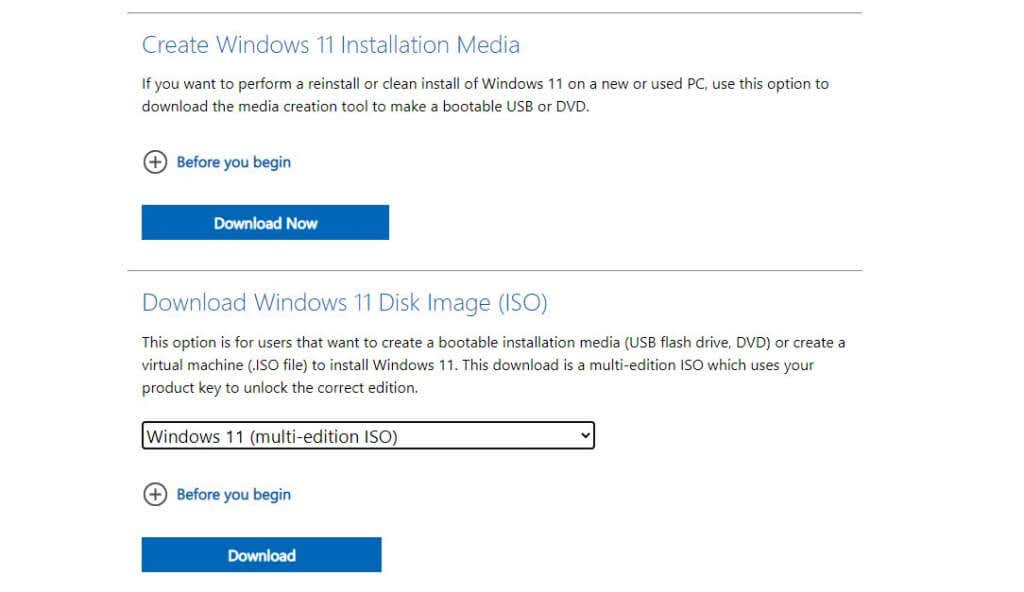
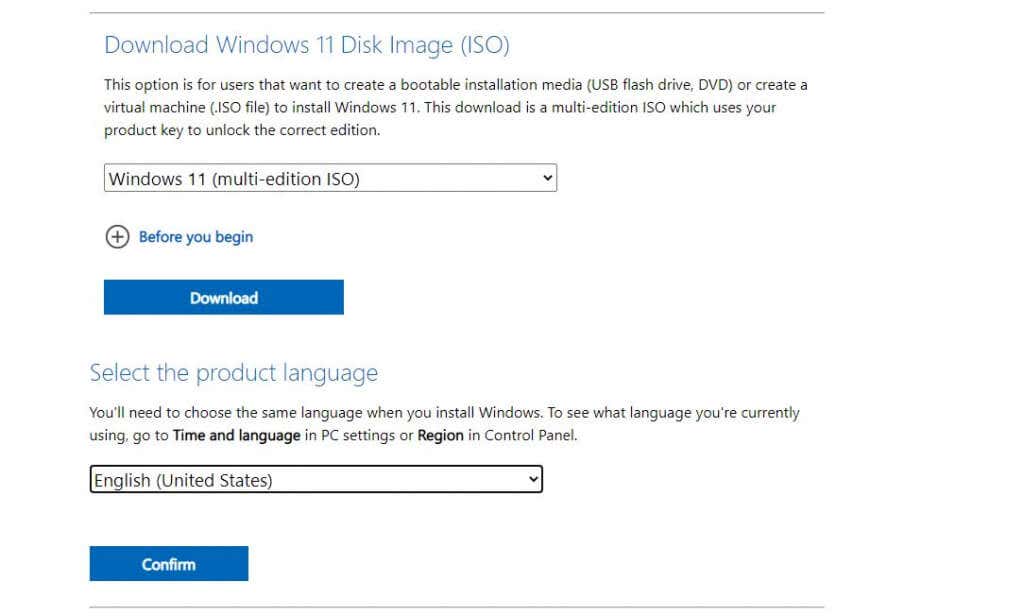
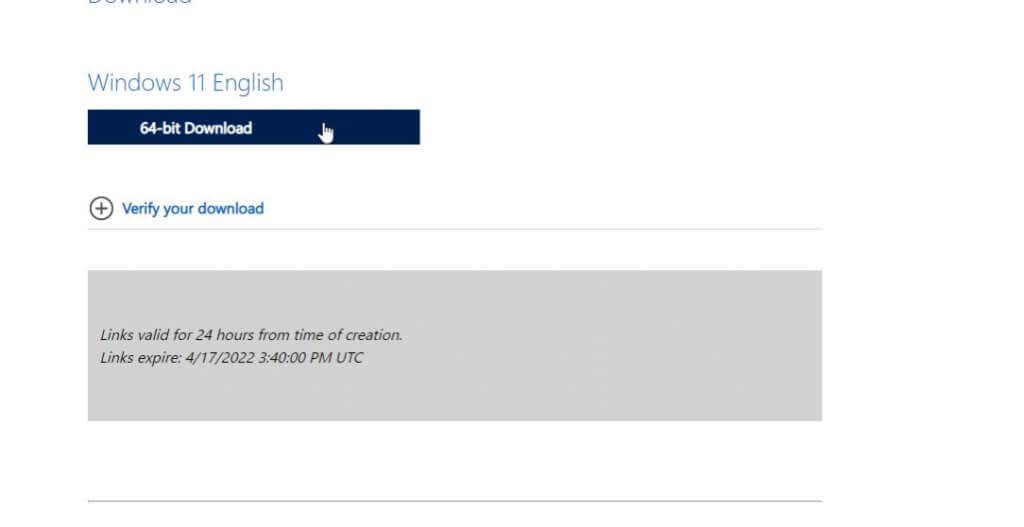
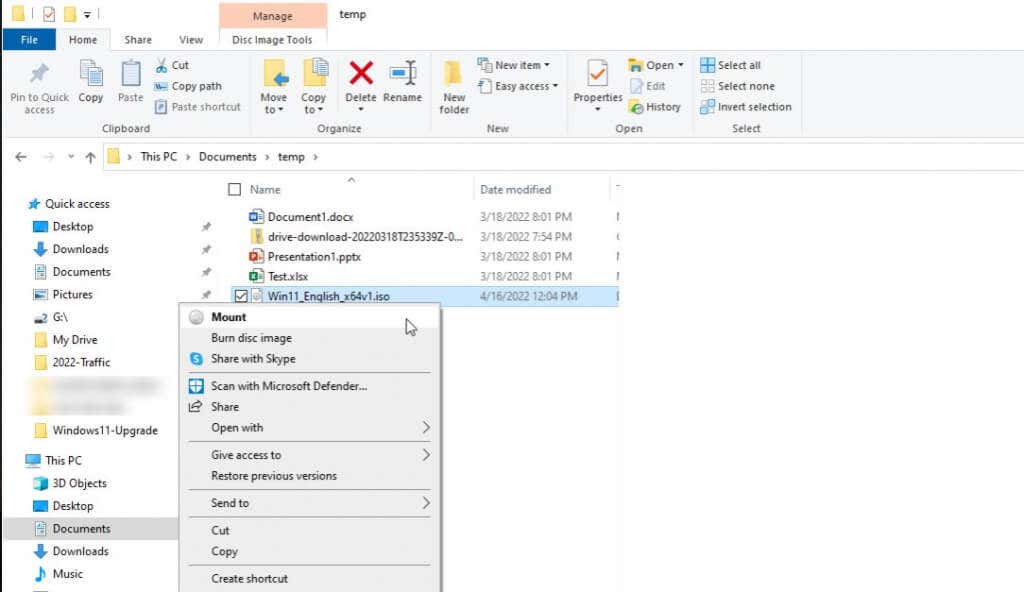
Download the Windows 11 ISO File
The first step is downloading the Windows 11 ISO file from Microsoft’s website. Note that this installation is for computers with a 64-bit processor only. Also, if you’re upgrading to a fully licensed Windows 10 PC, you won’t have to worry about any activation issues with Windows 11.
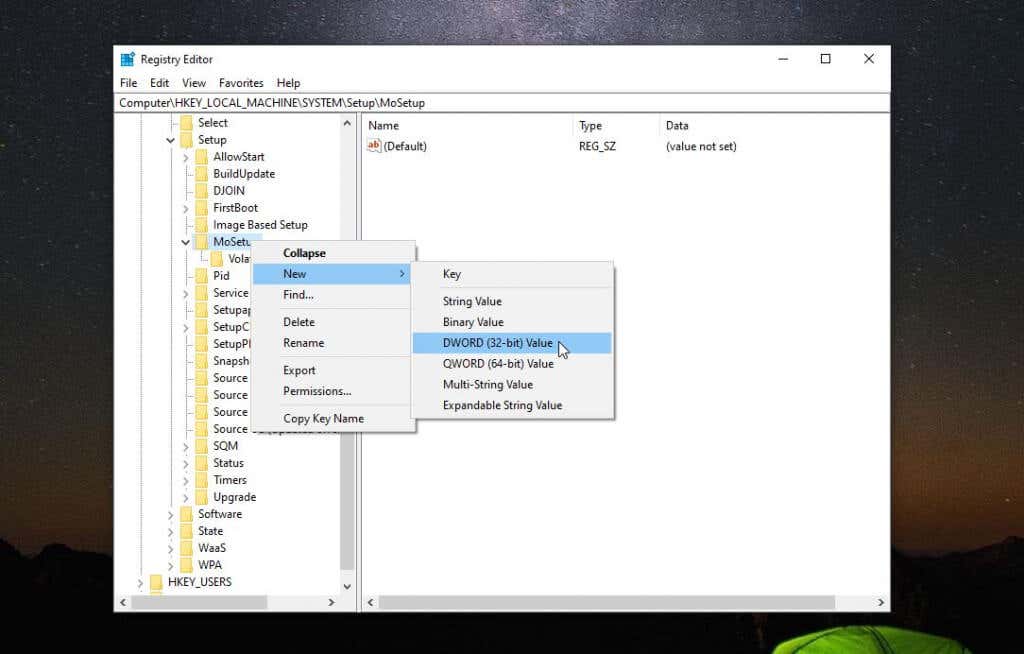
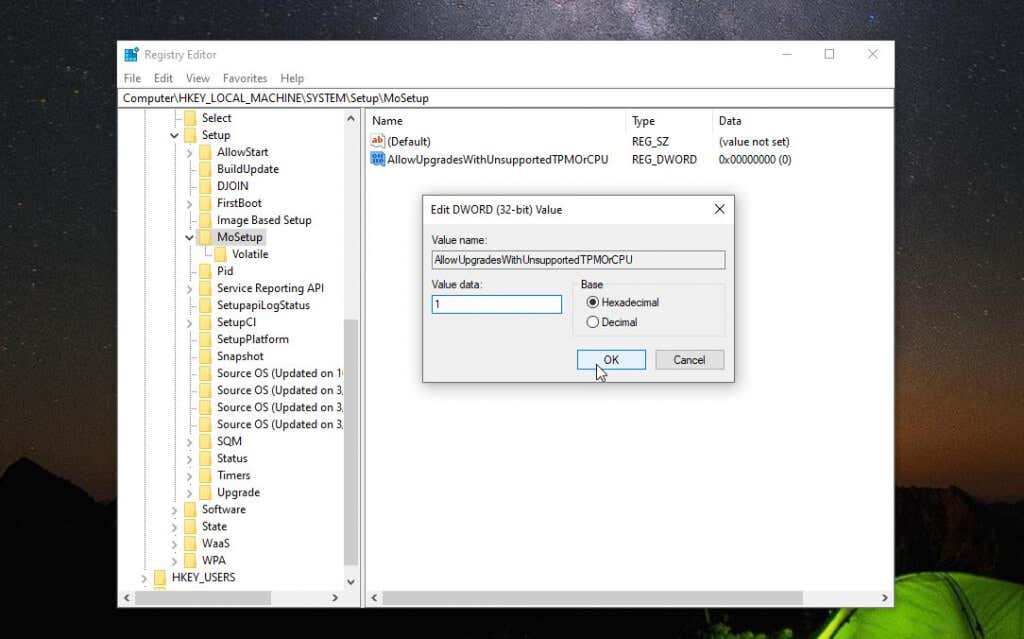
Make Registry Tweak to Install Windows 11
Next, you’ll need to add a registry entry to install Windows 11 on an incompatible system. You can close the registry editor at this point. Now, you’re ready to upgrade to Windows 11.
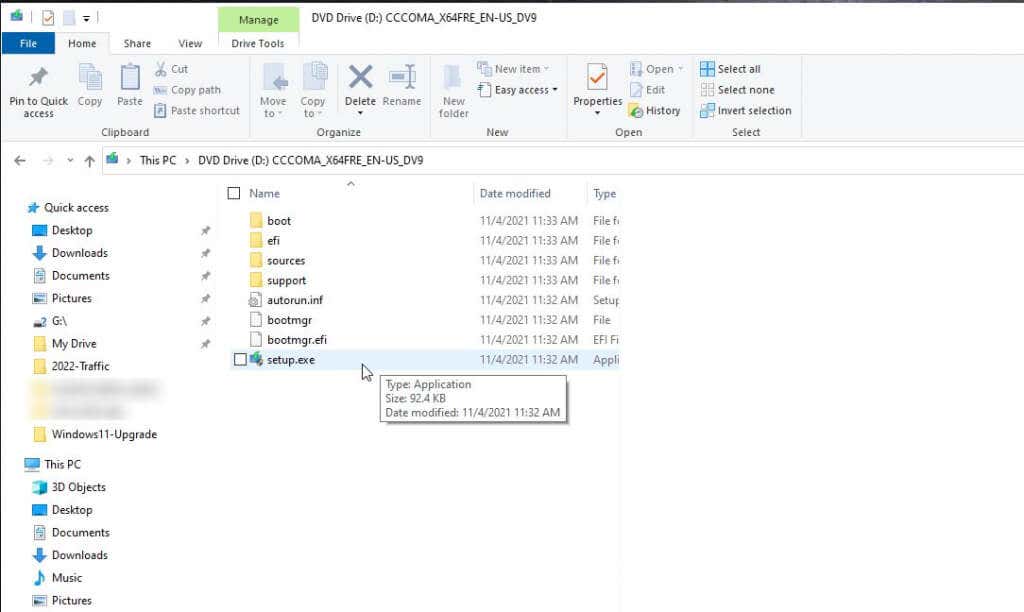
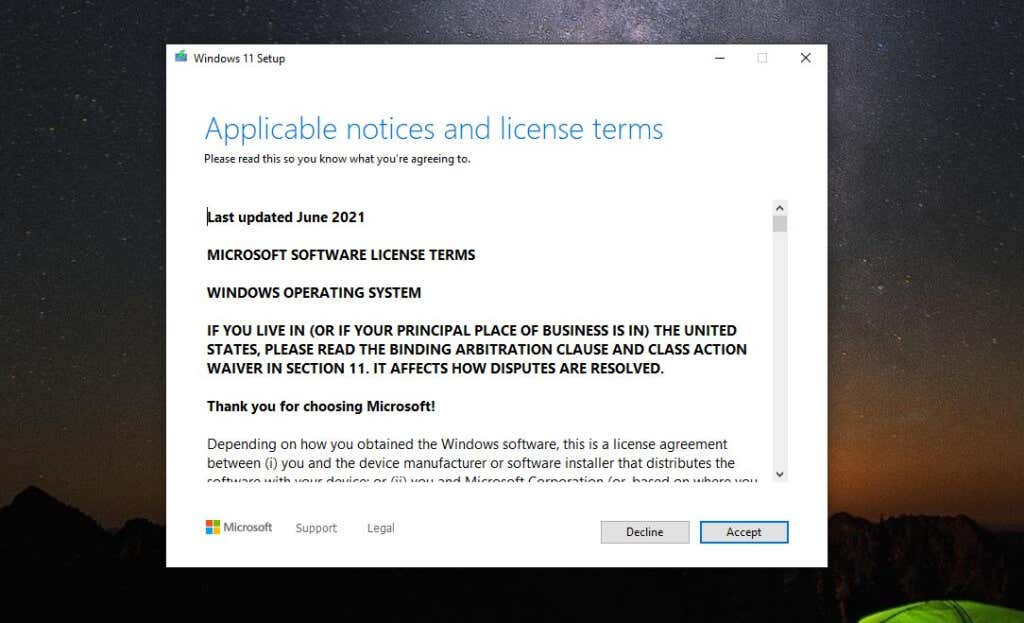
Install Windows 11 Using ISO File
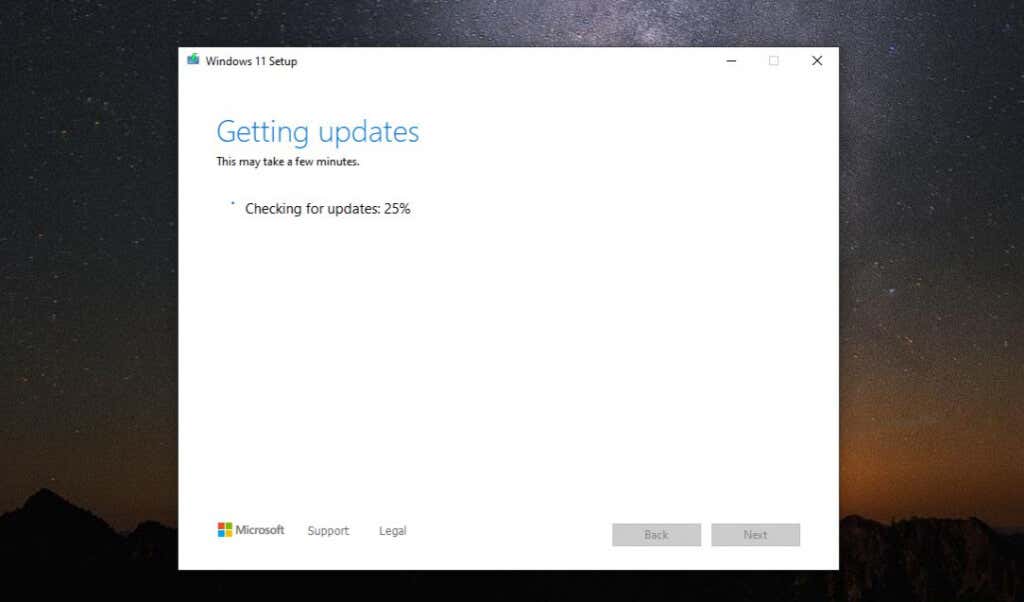
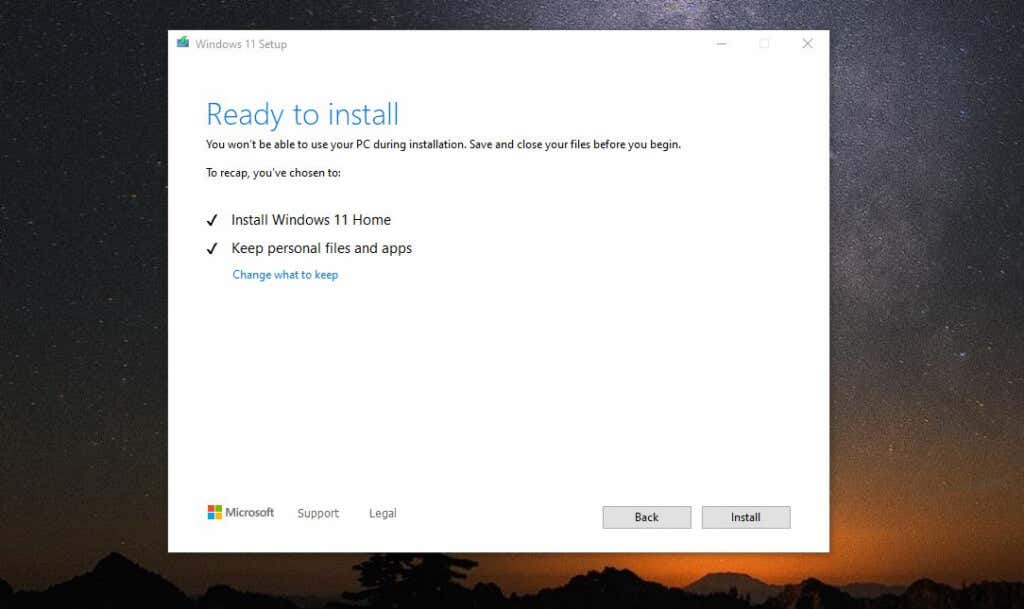
Once the ISO file is fully downloaded to your computer, follow the procedure below to upgrade to Windows 11.
You Can Now Enjoy Windows 11!
Once the process is completed, your computer will restart, and you will see the Windows 11 login screen. Just type the Microsoft account credentials you always used to log into Windows 11, and the new desktop will appear. Now you’re ready to start enjoying your new OS just like everyone else! Have you attempted this process and had any issues? Do you find that Microsoft’s warnings are unwarranted or have you had problems running Windows 11? Share your feedback in the comments section below.