Despite having many similarities and practical usage, ISO is widely accepted as the standard/format for disc images. ISO files are compatible with almost all operating systems (OS) as well as disk burning software. Many devices and OS have built-in tools that can extract and read disc files in ISO formats. IMG files, on the other hand, are commonly compressed and therefore unreadable by some devices and disk imaging software. Due to this disparity in acceptance and compatibility, many users prefer to have disk images/files in ISO format. If you find yourself needing to convert a disc image file from .img format to .iso, the tools and conversion methods in this post would come in handy. They’re relevant to both Windows and Mac devices.
1. Rename the File Extension
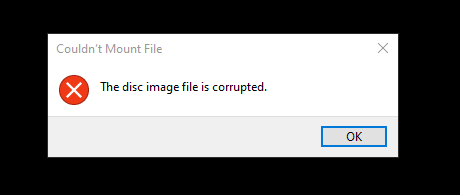
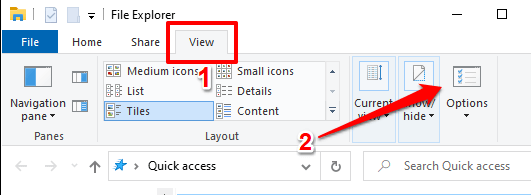
IMG and ISO disc image files have an identical data structure, save for the fact that the former can be compressed while the latter cannot. If an IMG file is uncompressed, you can easily convert it to ISO by renaming the file extension. The contents of the image file will function properly and remain unchanged. Right-click on the IMG file and select Rename in the context menu. Change the format (after the period symbol) from .img to .iso and press Enter on your keyboard. Open the renamed file and check if your computer can mount the ISO file. If you get an error that reads “The disc image file is corrupted,” the IMG file is most likely compressed. Revert the file extension back to .img and use other methods below to convert to ISO. Quick Tip: If you’re unable to change the file extension because the IMG file doesn’t have a .img extension suffix attached to its name, here’s how to make Windows show the file extension. Launch File Explorer and go to the View tab. Afterward, select Options on the Quick Access Toolbar. In the Folder Options window, go to the View tab and uncheck the Hide extensions for known file types option. Select Apply and then OK. The IMG file you want to convert should now carry a .img suffix in its filename.
2. Use Third-Party Software
There are a bunch of file management tools that offer file conversion services and do so brilliantly. We tested some of these programs and these are our favorites.
1. PowerISO
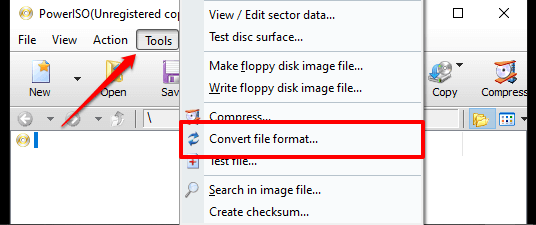
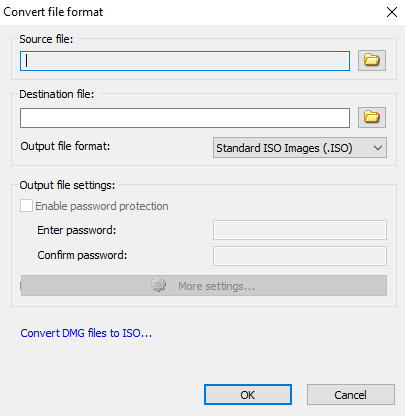
This tool lets you convert about 30 different image file formats to ISO. Although file conversion speed depends on file size, PowerISO converted our sample IMG file to ISO quickly. It’s important to note that PowerISO operates on a freemium model. The free version gets the job done just as fast as the paid/registered version, but with some limitations. First, you cannot create, edit, or convert files greater than 300MB as a free user. Secondly, there’s a 5-seconds pop-up (urging you to pay for the app) that you must view each time you launch the app. Download PowerISO from the developer’s website and install it on your PC. Select Tools from the menu bar and choose Convert file format. Select the folder icon next to the Source file dialog box to choose the IMG file, check the Enable password protection box if you wish to secure the resulting ISO file with a password, and click OK to start the conversion.
2. MagicISO
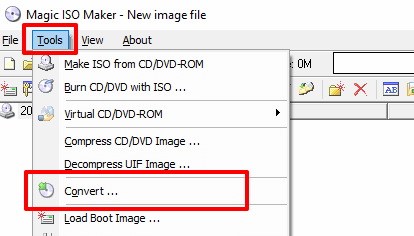
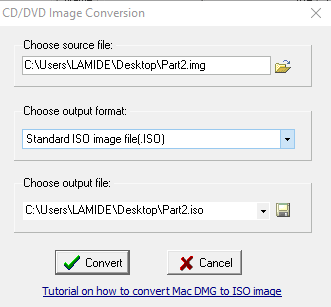
This is another great tool to convert IMG files to ISO. It can convert up to 10GB files (to ISO format) in a single operation but the free version has a 300MB limitation. Unlike PowerISO, you don’t get annoying pop-ups when you launch the app or anytime during usage. Install and launch the app on your PC, then proceed to select Tools on the menu bar and choose Convert. Click the folder icon next to Choose source file and select the IMG file you want to convert. Confirm that the output format is set to Standard ISO image file (.ISO) and click Convert.
Convert IMG to ISO on Mac
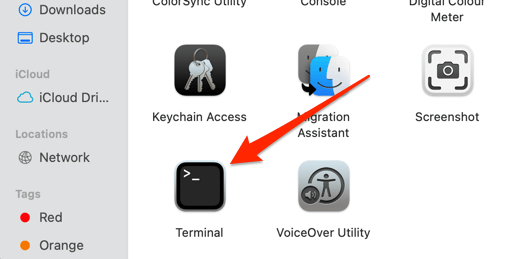
The apps mentioned above are only compatible with Windows PCs. If you use a MacBook or an iMac, there’s an easy way to convert IMG to ISO without having to install third-party software. All you need is the Terminal app.
- Go to Applications > Utilities and launch the Terminal application.
- Type or paste hdiutil convert and leave a space.
- Drag the IMG file you want to convert into the Terminal console. Press the spacebar to leave a space and proceed to the next step.
- Type or paste -format UDTO -o in the console and press the spacebar.
- Again, drag the IMG file you want to convert into Terminal but this time, rename the file extension from .img to .iso. You should have a string of commands like the one below. hdiutil convert /Users/name/folder/File.img -format UDTO -o /Users/name/folder/File.iso
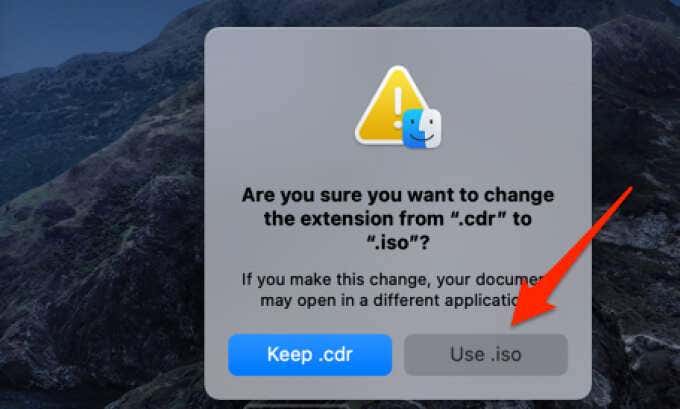
- Finally, press Return to execute the command. Terminal will create a new copy of the file in CDR format (that is, .iso.cdr) in the same path as the original IMG file. CDR is the Mac variant of an ISO disk image file. Rename the newly-generated file (delete the .cdr extension from the filename) and press Enter. Select Use .iso on the confirmation prompt. That’s it; you’ve successfully converted the IMG file to ISO. You can also use this trick to convert DMG files to ISO.
IMG to ISO in a Twinkling
These are the methods and utilities you can use to reliably convert IMG files to ISO. If you’re a Windows user, a third-party software is your best bet. Alternatively, transfer the IMG file to an external storage device and convert it for free on a Mac without any size limitation. Drop a comment if you’re stuck, need further assistance, or have other methods that are just as effective.
